Tag Archives: Tutorial

Change Yahoo! Messenger Login Animation

Hi.. We meet again. Its a long time since our previous tutorial.

Today we want to share a simple trick to change animation on Yahoo! Messenger.

yahoo messenger logo

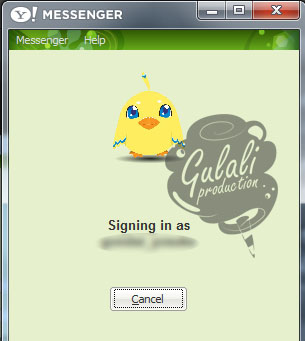
I think almost of you are know what is Yahoo! Messenger and what it is for. But some peoples maybe not, so here some screenshots of Yahoo! Messenger with normal loading animation.

ym login icon

yahoo messenger screenshot

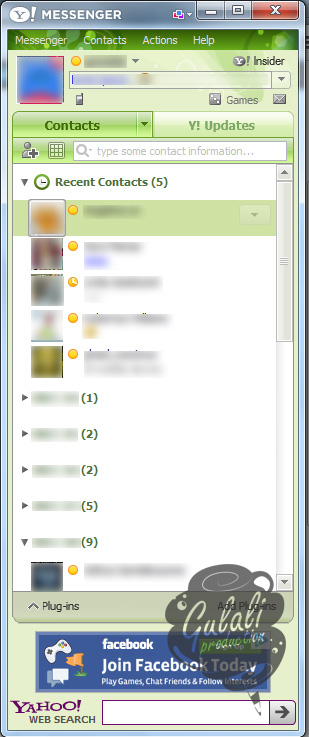
Now i can assume that all of you know what Yahoo! Messenger is. And as you can see above, the smiling face, that is what we gonna change to an interesting one.

This animation using swf file so we need Flash editor to create this. You can use Macromedia Flash 8 or Adobe Flash CS3 or greater. For animation images you can create object using tools from Flash or if you not good at drawing Flash is supported with import images from outside. It’s up to you which one is better for your animation.

After all assets is ready, now set up the project properties and timeline on Flash.  For background color it not to be your concern because you can use image for background, but if you want to know the default hex color for background is #E4EDF4. And also the default resolution is 150 x 120 pixels. When create timeline don’t forget to set name on frame. and also add script ” stop(); ” on one frame before next keyframe. But if you have a loop animation you can use script “gotoAndPlay(“asleep”);” instead of using stop. Here is the timeline sample.

screenshot of timeline

Now put animation based on the frame name. Put standby animation on asleep timeline, action animation on connecting and the rest animation. If you have animation with long duration don’t hesitate to extend the frame on timeline. On this tutorial we use frame by frame animation and here is our timeline after add the animations.

screenshot of timeline with animation

Next step is run your flash to create an swf file by press Ctrl+Enter. Make sure your swf file name is login.swf then replace Yahoo! Messenger login.swf with yours or rename it to login old.swf if you want to keep the default one. You can find login.swf file in “C:\Program Files\Yahoo!\Messenger” or if you using Windows 64bit its probably in “C:\Program Files (x86)\Yahoo!\Messenger”. You need to restart Yahoo! Messenger to make it run your new login.swf.

These the screenshots after we apply to our Yahoo! Messenger.

login file sleep animation

awaking and connecting animation

connected animation

Loading Time Problem

I know everyone have different connection speed. You know what? This loading time will affect to your login.swf will show all animation or not. With normal or hi-speed connection you will only view connecting and awaking animation. Especially if you using long duration on connecting and awaking animation. To solve this problem we have two alternate options or if you have the other one please share to us.

1. Short Duration

As you know, you only have little time to show your animation. So obviously you need a shorter animation. Either you cut of your animation or change to another animation. Change to higher fps on your file is also another options for make less time but it will affect on your animation appearance.

2. Remove Script

The second options is remove script “stop();” after awaking animation. See screenshot below, i remove script inside red circle. Without script on this frame your animation will keep play to the end of frame and no need to wait connected statement.

screenshot of timeline with animation updated

If you have some problem about this tutorial, let us know so we can help you.

xoxo

The Gulali’s Army

Tagged , , , , , , ,

Frankey – A Little Monster Come In Halloween

Halloween is coming..

To celebrate this event we have a little gift for you, a scary little monster, Frankey.

Frankey is a papertoy that skin designed by Gulali Production and using Tougui template, here. In this post we will share this monster for you and also a mini tutorial how to   awaken this monster will be provide.

Before starting build lightning machine to awake your Frankenstein, download and grab Frankey pattern here.

I know all of you is know how to build a paper toy and you can just see all image below to guide you. But there are also a beginner in everything. So here we are giving a small tutorial to build a simple paper toy.

The first step is of course cutting layout into pieces. Make sure you use sharp scissor so you can cut a small part easily. We recommend you to do with the larger part first for a better way and also to reduce the possibility of losing small part while you cutting on the large one. Here all part when you finish cutting all parts.

Next step is bending all parts for preparing on next step. This step is important because your Frankey shape will depend on how precision and good your skill on folding paper. All part in this paper toy is folding to inner side or if you have a part face up you will have a peak shape. But on foot, there is one area you must folding other way so you will have a valley on it. Here all part after looks like when you bend or fold in right way.

This step is the most difficult section when you make or build a paper toy. It’s complicated or not based on which part you use for starting to sticking paper especially if there is a lot of part on it structure. But Frankey only use small amount of parts so you no need to worry. Even it’s easy, we will give you step by step sticking each part with glue.

First part is from the largest part, Frankey body, then you can continue to smaller parts. As you can see, there is an area with lines on it. That is area where you must give glue on it. Put slight glue gently and don’t give to much glue because it can ruin your paper.

If you fold your part in right way, you will know which glue area will stick on another area to make right shape. Here all parts after you done in this step.

When all parts is ready, now is time to wake up your Frankey.  You can start with put hands in main body then following by his leg. See image below for where place to join all parts.

You can put his hands on the side or toward the front and it’s up to you. Here the Frankey one and Frankey two.

If you interested with post contain about paper toy, please tell us. And help us to share it if you like 😀

That’s all for today. I hope you guys like it 🙂

xoxo

The Gulali’s Army

Tagged , , , , , , , , , , ,

Painting Process in SAI Paint Tool : Man and Gun

Hello Sweets,

We meet again this evening Tuesday ! This time the post is all about painting process in SAI Paint Tool.

For short brief, the process started with just something like a child’s drawing, all messy and deformed. But, the important thing is, you know in your mind what you strive for, or what will the final product is, again in your brain. And the rest is, detailing the picture.

By doing this in just grayscale, we will learn much about value. And one of  important aspect in every picture is value. That’s the one I’m learning right now. Credit to my highschool friends telling me about this 🙂

Here is the process 🙂 click to zoom

Man and Gun Tutorial by Gulali Production

Man and Gun Tutorial by Gulali Production

For the final product, I adding some colors. But, it’s hard to tell the process because I still not know the right way to add colors. Mostly, I just tested every layers combination without knowing what it will become.

Man and Gun by Gulali Production

Man and Gun by Gulali Production


Another drawing process :

Thanks for reading :)

xoxo

The Gulali’s Army

Tagged , , , , , , , , , , , , , , ,

Create Button effect at website -beginner-

Halooooha~~~~ I’m back again, and again and again 😀 hohohohoho.
Today I will give you all a tutorial again. This tutorial is still related to previous tutorial, where we made Gulali’s button. Click here to see the tutorial.

Back again to this tutorial. So previously we make some button for your website or other design. This time we will focus on making a button for website. Why? because if you are aware, button at website have some effect like when you hover the button or when you click them. I really want give you some example here to ease you, but in wordpress here I can’t give a button effect like hover or click. But I will give a website with the effect 😀

Link << This website is one of my projects now 😀 but we won’t discuss about the design, just focus at the “view product” button. If you hover the button or click the button you will see the effect there. So today we will make button like that, from the design and some coding to make the effect work at your website 😀

========================================================================

Step 1

Let’s start with the last button you make from previous tutorial. You can make other button or just download it from the previous tutorial, I will use the PSD file that i give you at the previous tutorial.

So let’s clear this first. We will make 1 button with 3 effect. First is the normal, just like the previous Gulali’s button we made. Second is the effect when we hover the button, we will make it a little lighter. The last or the third we will make a button with a click effect.

First open your previous data. Save it as a .png file. Then group all the layer become one and name it as “Button 01”. Next duplicate the group and name it as “Button 02”. Then make group “Button 01” become invisible with click on the eye icon beside the group.

Ok we already have all we need to make the second button. Like I said before, we will make the button a little light on it. So open the layer style of the button layer *if you use my .PSD file, it will name “Background”. Make the gradient overlay’s opacity become 25% or less than your previous button.

Then you can change any things you want. Maybe like move the arrow a little down. If you already satisfied you can save the button as .png file again.

———————————————————————————————————————————–

Step 2

Next, we will make the third button. This time, we will make it look like it clicked. So first duplicate again the “Button 01” group and name it as “Button 03”. Next, open the layer style of the button layer. Set drop shadow’s blend mode become screen and the color change to somethings lighter than the button color, and opacity less than before. At inner shadow tab, blend mode become multiply and the color change to somethings darker, then opacity less than before and  set the distance to 10, choke to 10 and size to 5. The last part, Gradient overlay, just give mark at the reverse check box.


Same like the last button, save it as .png file and you got all you need take your button to your website 😀

———————————————————————————————————————————–

Step 3

We already have all the material we need. Now open any program for edit you website *I used Dreamweaver. First make a new file or open your own file. We will make the html file first, so create an new HTML file and save it with name “home.html”.

First we make a div for our button
<div class=”button”></div>

Now we make the style for our button. Make style tag above the body tag. First we will set our width and height. Make your div size as same size as your button size.

001
002
003
004
005
006
<style>
.button{
width:450px;
height:155px;
}
</style>

Next we will set our button background with the button 01.png

001
002
003
004
005
006
007
<style>
.button{
width:450px;
height:155px;
background-image:url(Button01.png);
}
</style>

Ok, now we already have our button. Next, we will give the hover effect. Just copy the previous code and paste below it. Delete the width and the height code. Change the background-image with button02.png and add “:hover” after the class name.

007
008
009
010
.button:hover{
background-image:url(Button02.png);
}
</style>

The last is the third button for the click effect. Same like before, copy the button code and change the hover with active and don’t forget change the background into button03.png

010
011
012
013
.button:active{
background-image:url(Button03.png);
}
</style>

Ok! now you already have a button with hover and click effect 😀 and if you want to make your button look more like a button in website, add “cursor:pointer;” at the button class and when you hover the button, your cursor will change into pointer.

And that’s it! You can make other creative button you like. Just remember to make 3 button, first for the normal one, second for the hover effect and last for the click effect. Like usual I hope this tutorial is useful :D .

help us to share this tutorial and I really welcome for any comments and feedbacks. See you until the next post!!! :D

xoxo

The Gulali’s Army

Tagged , , , , , , , , ,

Create a Gulali’s Button Using Photoshop -Beginner-

Hello!!! I’m back again! This time I will give you a tutorial to make your own button 😀
So you ask what button? You actually already see the button twice 😀 if you read our articles at Free Monster Maker V1.0 ” and ” Free Wallpaper Again! Today is Avenger Wallpaper “.
Yes that cute button there, soon or later we will make it together and don’t worry I will give you the source file (.PSD format) at the end of this section. So let’s start the tutorial.

Final Product

What You’ll Be Creating

========================================================================

Step 1

Let’s start with a new document in Photoshop. The size is up to you, you can create any size of button depend on what kind of button you want to make 😀 *I will use 450×150 pixel

———————————————————————————————————————————–

Step 2

Next, let’s create the button’s shape first. Start by creating a shape called “background” and fill it with any color you like. I used Rounded Retangle Tool with color #2DA9E0.

———————————————————————————————————————————–

Step 3

Ok! If you look at the button in other post, you can see that button is using gradient color, so we will set the color for our button with gradient color. But if you want using solid color, that’s not problem. To color the shape with gradient color, double click at the background layer to open the Layer style. Or right click at the layer and choose Blending Options…

Now you will see new window name layer style. Click at the Gradient Overlay. You can choose your favorite colors for the button. Or you can use the white-black color and then change the blend mode to multiply with opacity value 50%.

Next, we will give some emboss effect to our button here. So someone can feel like to click the real button :D. As same step as the gradient, open the layer style again. Now choose drop shadow *we will give our button some shadow. Oh, almost forget, before attach some shadow, we need to enlarge our canvas. Why? Because if we don’t enlarge our canvas, our shadow can’t be seen.

To enlarge your canvas, choose image > canvas size. Get the Anchor into the top middle, and add 5 pixel to our height.

Back to the shadow things. Open again the layer style, and choose the drop shadow. First change the angle become 90,  Opacity become 40%, then make the distance become 4 pixel and other 0 pixel.

Next the lighting. Open layer style again and now we will set the Inner Shadow properties. First change the blend Mode become  screen and change the color into white or other color for the shine. Like the shadow make the Opacity become 40%, distance 4 pixel and other 0 pixel and then click OK.

———————————————————————————————————————————–

Step 4

Ok, you already can see your button now. Next step is write somethings on your button. So type any word you like with any font that match with your design. You can type ” Click here ” ” Click ME! ” ” Click here to download ” ” download here “. *I use ChunkFive

Next we will give same effect for the text. Like before, give gradient, drop shadow and inner shadow effect for the text here.

———————————————————————————————————————————–

Conclusion

Voila, you just create your own button. But it can be enhanced such as you can give some picture or shape you like. May be like an arrow for download or anythings related to your design. Be creative and costumize your button for more cool looking button. You can give texture too for your button, all is up to you, OK?

The last before I close my post, I will give you the .PSD file like I tell first.

I hope this tutorial is useful :D.
help us to share this tutorial and I really welcome for any comments and feedbacks. See you until the next post!!! 😀

xoxo

The Gulali’s Army

Tagged , , , , , , , , , ,

Learning Class Programming on Flash – Setter and Getter

In this section we will discuss about how to set value into a class and get the value from it. After we learned about Accessibility of Class, we know that we can’t directly access attributes and methods from some class if it set as private. To solved this problem we need public method for set value and get value from the class, and its called setter and getter. For a sample here is two variable that we want to set and get the value.

Setter Method :

This is public function for send one or more values into class and update the private atributes. Sample of this code such as object.setMoveSpeed(value), object.setBackgroundImage(value, value), and object.setOnClickListener(value). This image below is a sample code for setter method.

And if you also want to send parameter, you can use ‘changeColor(param:String)’ and then use ‘color = param;’ to set the color value.

Getter Method :

This is public function for get private variables value from some class. Sample for this code like object.getPosition(), object.getChildNum(), and object.getIndex(value). This image below is a sample code for getter method.

You can send parameter with this method too and depend on what the parameter is use for.

Next Step – Event Listener

Tagged , , , , , , , , , , , ,

Learning Class Programming on Flash – Accessibility of Class

Class have 3 ways to access it properties, private, protected, and public. When you read sample class code in this blog or sample code from other tutorials, you will notice this access type there.

Private

With this access rule, all private attributes and all methods can only be accessible from the class it self.

Protected

This is a default type of accessibility in actionscript when you don’t define its type. With this type all attributes and all methods can only be accessible from its class and its inheritance class.

Public

While you set as public, it is accessible from anywhere.

Now set all attributes and method using this accessibility type and update the class. For this step, I put images of my class for a sample.

For attribute, you can set as public or private. In this image I didn’t put public since it’s a default type.

For private method, you can do the same thing like attribute.

When you want to set a method as public you can either define it as public or just leave it without a type. And then this is for the complete code.

Next Step – Setter and Getter

Tagged , , , , , , , , , , , ,

Learning Class Programming on Flash – Structure of Class

In section 2, will contain about class structure. As we learn about class in previous part, every class have attribute and method and a constructor with the same name with it class name. This is example code for class Car.

Sample class

Every class have structure or a several code that contain two parts, attribute and method. As you see in this code there are two variables as attribute and two functions as method. The part that you need to concern is first function, it has the same name as it class and its called constructor. The constructor will be run when ever it class is defined. Let’s try create new class in flash. In this article i will use actionscript 3.0 for tutorial.

The package is about where you place the class and its using relative path from your main fla file. I just write ‘package’ since i put this class with the same path with my fla.

You need import another class when you want to use other class feature.

extends in this line is like inheritance (we will talk about this later) so your class have attribute and function from class that you extend. In my class, its extends from movieclip so my class will have movieclip method such as for set height, width, and other methods.

Some variable as attribute in this class. You can add another attributes for your class if you need it.

Constructor with eventListener that will run when you create new object from your class. And function moving while the object enter the frame.

And two methods for moving your car later and set the car’s color.  And this is image for the whole code.

Next Step – Accessibility of class

xoxo

The Gulali’s Army

Tagged , , , , , , , , , , ,

Learning Class Programming On Flash

In this section i just want to share something about actionscript 3 from flash. I hope this article can help someone there to solve their problems or just curious about object oriented programming with flash. But sometimes maybe i make some mistake, so its free for you to correct me. On the first post it will contain about what class is and how it help you create flash game easier.

Class is concept that represent everything in this world into object. For example we have class to represent a car. Every class have attribute and method or the object specifiation.  This class have attribute (something that class have) such as color, wheel numbers, and engine power. This class also have method (something that this class can do) such as move, break, and shifting gear.

When you defined the class it will called object, in this case from class car we can create object name ferarri, porsche, or audy. For example, check this image.

Sample class - Car

Define new car

At the second picture you will notice that you can create more object with one class. With this method you can create a lot of objects without write code as much as you create that objects. So you can make game easier and faster than using basic code.

Next Step – structure of class

xoxo

The Gulali’s Army

Tagged , , , , , , , , , ,

Head Drawing Study

Hello sweets,

So today I found some learning material for head drawing. It says, memorizing the planes of the head is a must for us, that we can have the foundation for rendering the head later .

To memorize them, I draw it back. Here is my tries :

head_drawing_plane

Doing this really helps me to find which part of the head should be lighter or darker.

head_drawing_study

I still confused about the nose, ears, and eyes part. Tomorrow I’ll browse around the nets to found other learning materials about that.

Thanks for reading 🙂

xoxo

The Gulali’s Army

Tagged , , , , , , , , , , , , , ,