Category Archives: Design

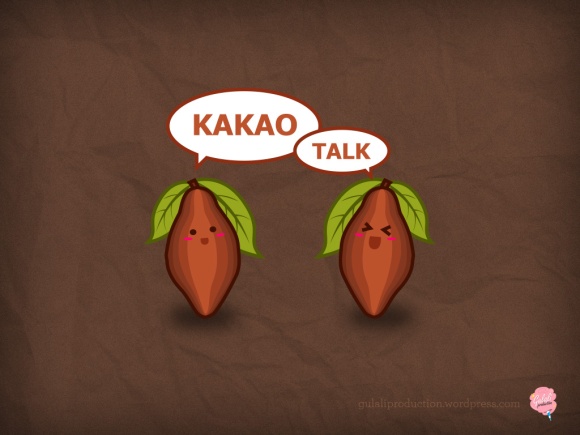
Kakao Talk Cute Free Wallpaper

Hello Sweets,

Meanwhile in Indonesia, Kakao Talk  is booming right now !

KakaoTalk is a free mobile messenger application for smarthphones with free text and free call features. It is available in many OS.

Well, then the name “Kakao Talk” inspires us to make this cute wallpaper. I hope you guys enjoy it.

😀

kakao talk wallpaper gulaliproduction1024x768

1024×768 1280×800 | 1600×900 | 1920×1200

That’s all for today. I hope you guys like it :)

xoxo

The Gulali’s Army


Tagged , , , , , , , , , , , , , , , , , , , , , , , ,

Christmas Mood

I’ts always a calm, warm and peace situation for me when it’s December. I don’t know what is the reason. Maybe it’s because of the short break, after a full year activities finally I can get some rest. Yeah, the christmas  holiday!

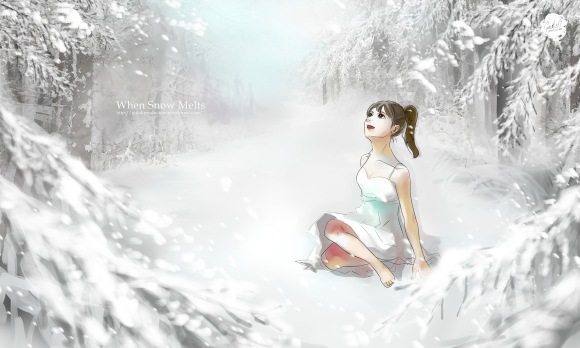
I missed the moment when I can relax and do my favorite activities, no other than drawing. I need to let this imagination out of my brain. The story from Tiwy, a.ka. kucingkeriting, you can get to know her from our section “About Us”. Her story called When Snow Melts.

Image

Charilaine Snow from When Snow Melts

much cooler than Storm -Lavey

Tagged , , , , , , , , , , , , , ,

Frankey – A Little Monster Come In Halloween

Halloween is coming..

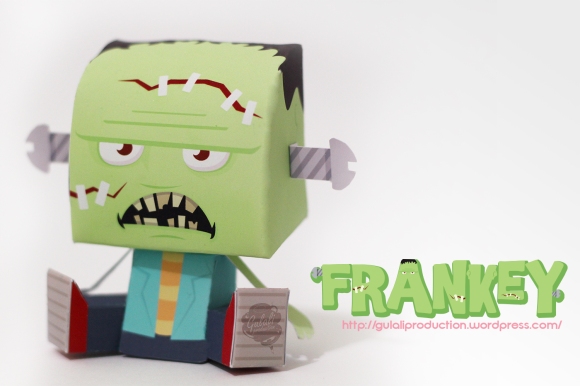
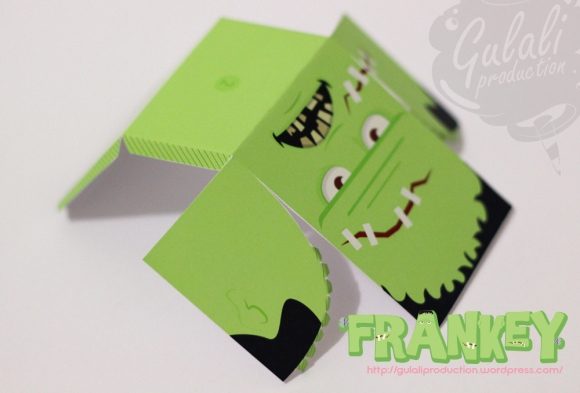
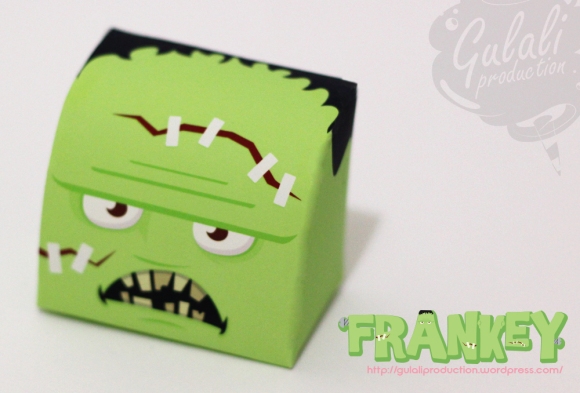
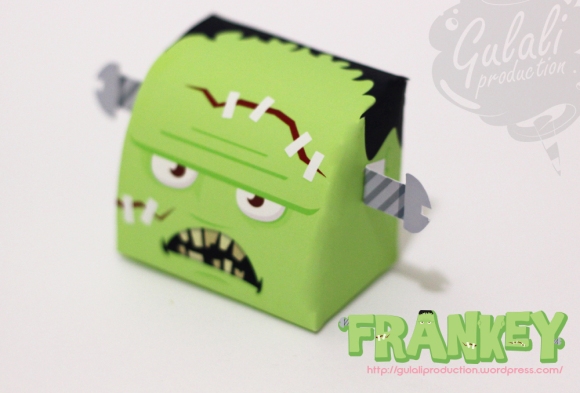
To celebrate this event we have a little gift for you, a scary little monster, Frankey.

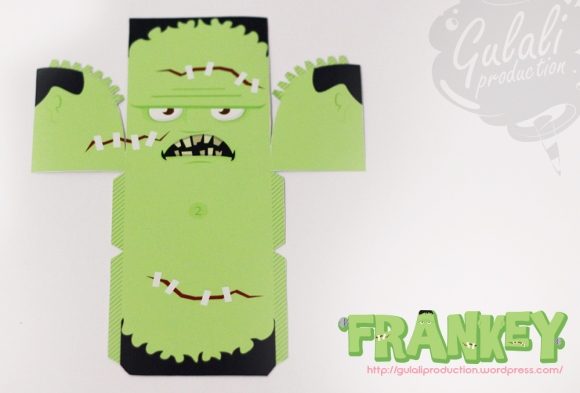
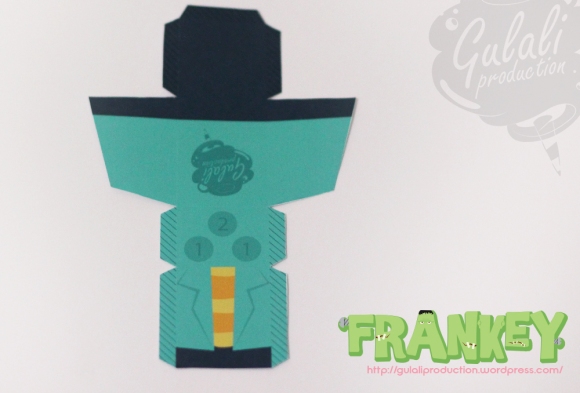
Frankey is a papertoy that skin designed by Gulali Production and using Tougui template, here. In this post we will share this monster for you and also a mini tutorial how to   awaken this monster will be provide.

Before starting build lightning machine to awake your Frankenstein, download and grab Frankey pattern here.

I know all of you is know how to build a paper toy and you can just see all image below to guide you. But there are also a beginner in everything. So here we are giving a small tutorial to build a simple paper toy.

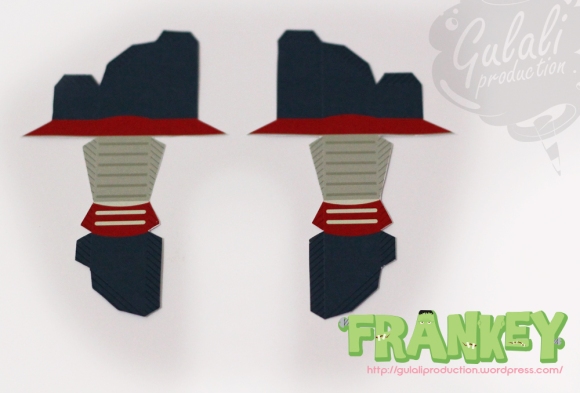
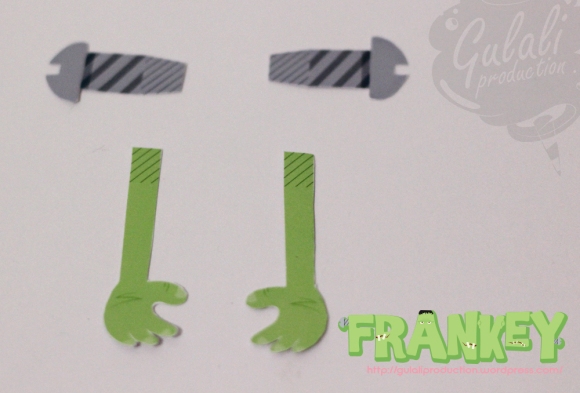
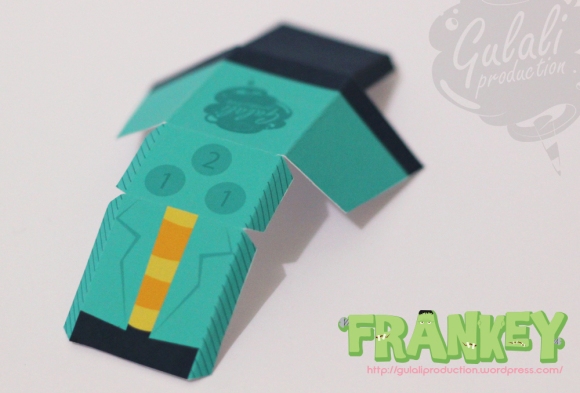
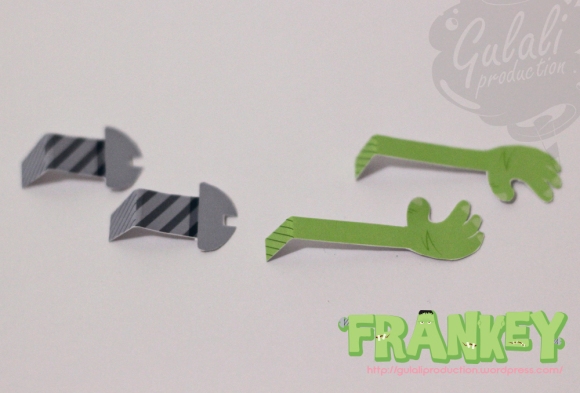
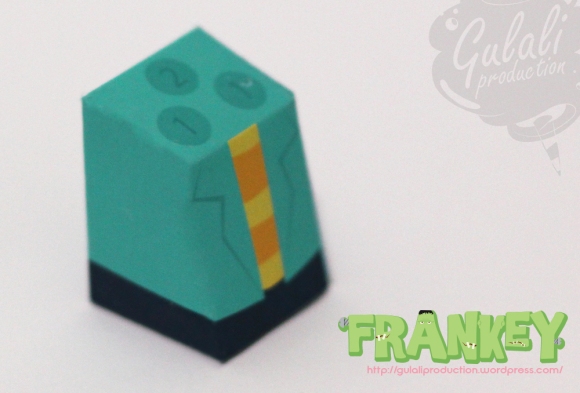
The first step is of course cutting layout into pieces. Make sure you use sharp scissor so you can cut a small part easily. We recommend you to do with the larger part first for a better way and also to reduce the possibility of losing small part while you cutting on the large one. Here all part when you finish cutting all parts.

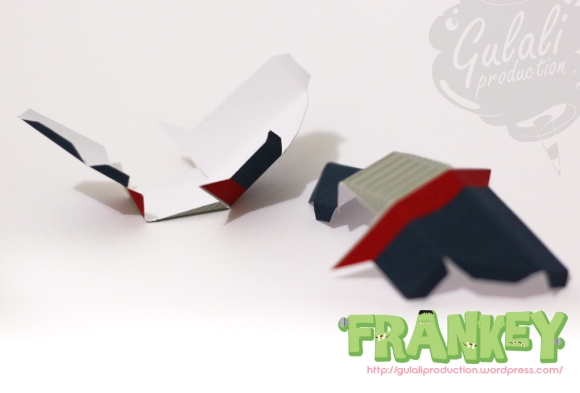
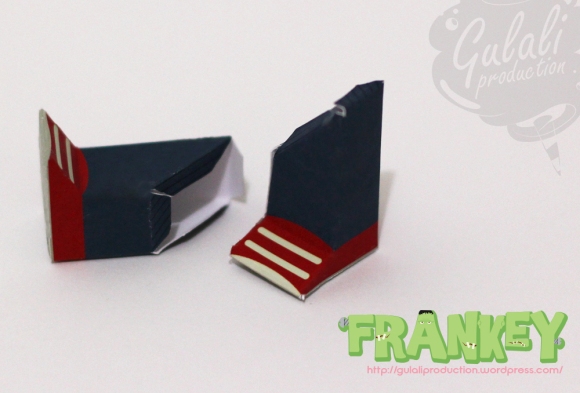
Next step is bending all parts for preparing on next step. This step is important because your Frankey shape will depend on how precision and good your skill on folding paper. All part in this paper toy is folding to inner side or if you have a part face up you will have a peak shape. But on foot, there is one area you must folding other way so you will have a valley on it. Here all part after looks like when you bend or fold in right way.

This step is the most difficult section when you make or build a paper toy. It’s complicated or not based on which part you use for starting to sticking paper especially if there is a lot of part on it structure. But Frankey only use small amount of parts so you no need to worry. Even it’s easy, we will give you step by step sticking each part with glue.

First part is from the largest part, Frankey body, then you can continue to smaller parts. As you can see, there is an area with lines on it. That is area where you must give glue on it. Put slight glue gently and don’t give to much glue because it can ruin your paper.

If you fold your part in right way, you will know which glue area will stick on another area to make right shape. Here all parts after you done in this step.

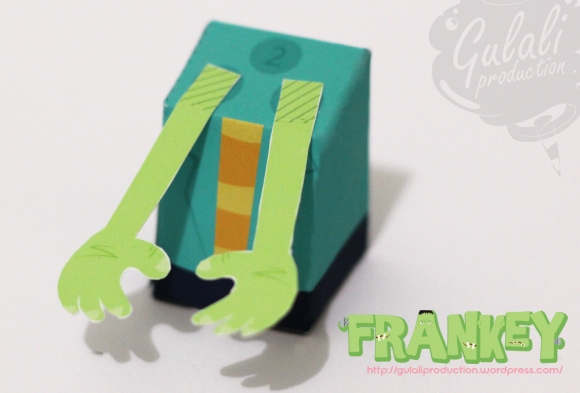
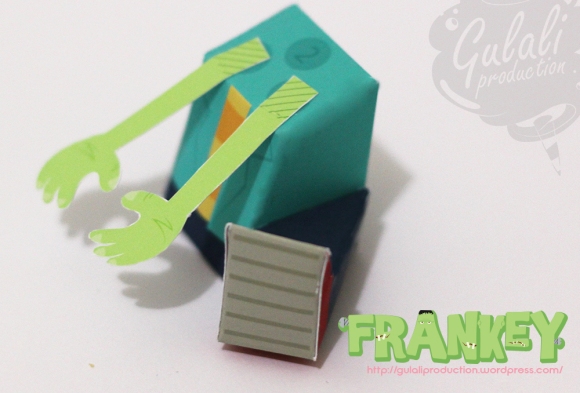
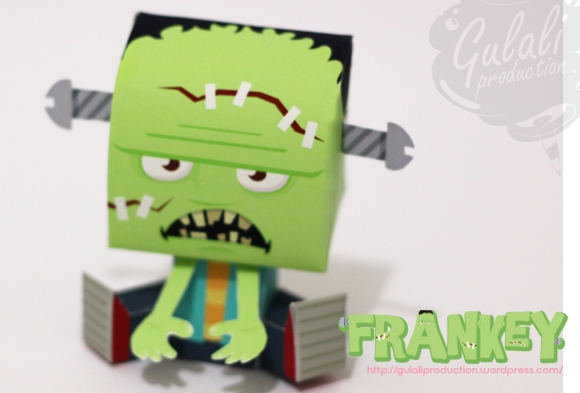
When all parts is ready, now is time to wake up your Frankey.  You can start with put hands in main body then following by his leg. See image below for where place to join all parts.

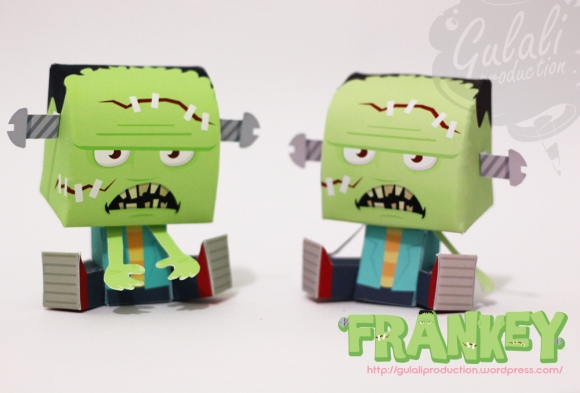
You can put his hands on the side or toward the front and it’s up to you. Here the Frankey one and Frankey two.

If you interested with post contain about paper toy, please tell us. And help us to share it if you like 😀

That’s all for today. I hope you guys like it 🙂

xoxo

The Gulali’s Army

Tagged , , , , , , , , , , ,

Illustration : Secret Night View

Hello sweets,

I always think  drawing scenery is really hard. LOL. And I don’t know what to do, what to think about.

It just.. I don’t really understand the fun you can get while drawing scenery. Drawing scenery is a ‘horror’ to me until I found the tutorial video on Youtube by Noah Bradley. It really helps me a LOT, giving me some really nice tips and helps me to find the ‘fun’ while drawing scenery. Watch it on Youtube if you are interested 🙂
So, here it is.. I’m trying

Secret Night View

Secret Night View

Where everyone in the city currently busy with their own business. We watch the secret view behind these glorious clouds at the top green hill.

xoxo

The Gulali’s Army

Tagged , , , , , , , , ,

Perahu Kertas (Paper Boat) Cute Wallpaper For Desktop

Hello Sweets,

Meanwhile in Indonesia, there is a novel called “Perahu Kertas”, or in english “Paper Boat” is booming right now !

This lovely novel is written by famous female novelist called “Dee”. Our crew, Gulali’s Army, seems to love at the first sight after reading few chapter of this novel. Wherever we go together, we talked about the funny part of this novel, the character Kugy and Keenan.

Well, because of our love to this novel, we made a wallpaper about it. Hope you like it guys 🙂

1024×768 | 1280×800 | 1600×900 | 1920×1200

That’s all for today. I hope you guys like it 🙂

xoxo

The Gulali’s Army

Tagged , , , , , , , , , , , , , , , , , , , ,

Painting Process in SAI Paint Tool : Man and Gun

Hello Sweets,

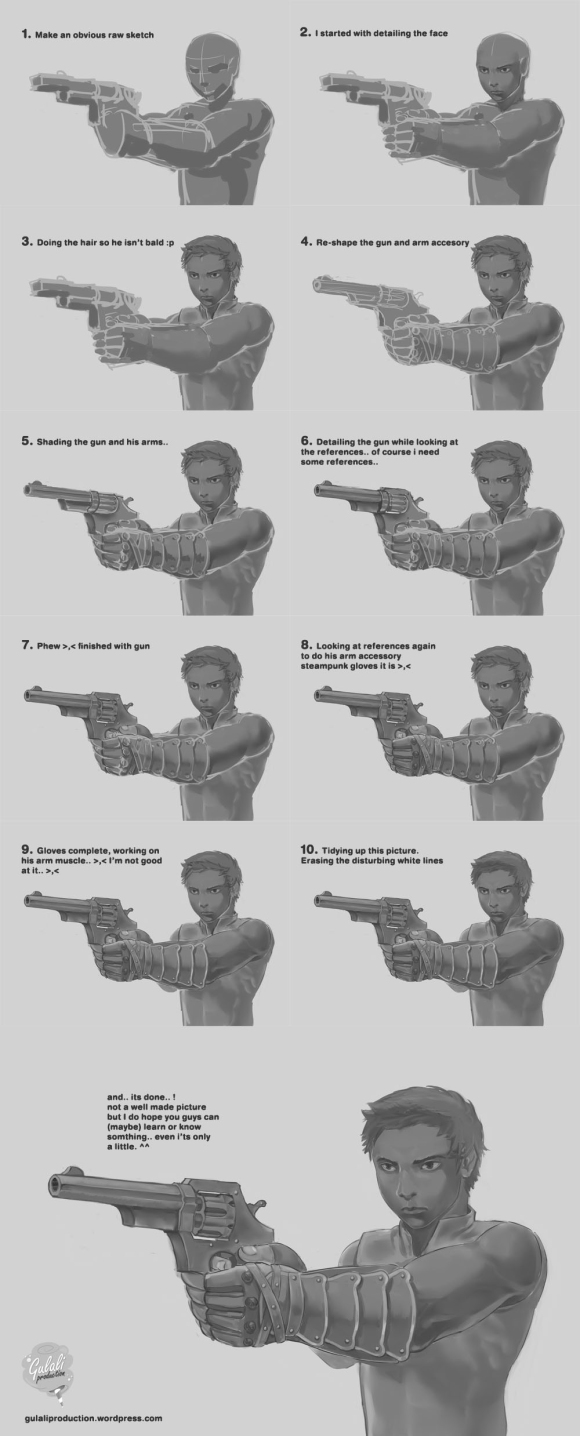
We meet again this evening Tuesday ! This time the post is all about painting process in SAI Paint Tool.

For short brief, the process started with just something like a child’s drawing, all messy and deformed. But, the important thing is, you know in your mind what you strive for, or what will the final product is, again in your brain. And the rest is, detailing the picture.

By doing this in just grayscale, we will learn much about value. And one of  important aspect in every picture is value. That’s the one I’m learning right now. Credit to my highschool friends telling me about this 🙂

Here is the process 🙂 click to zoom

Man and Gun Tutorial by Gulali Production

Man and Gun Tutorial by Gulali Production

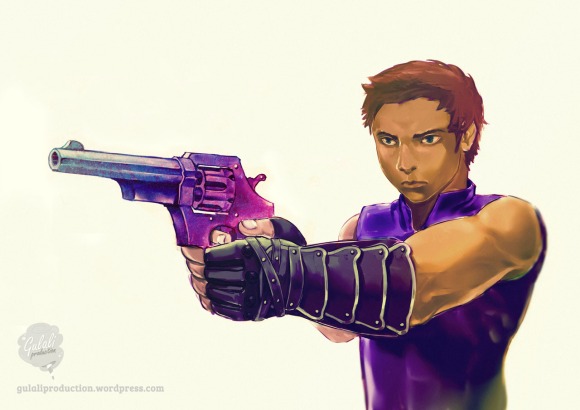
For the final product, I adding some colors. But, it’s hard to tell the process because I still not know the right way to add colors. Mostly, I just tested every layers combination without knowing what it will become.

Man and Gun by Gulali Production

Man and Gun by Gulali Production


Another drawing process :

Thanks for reading :)

xoxo

The Gulali’s Army

Tagged , , , , , , , , , , , , , , ,

Create Button effect at website -beginner-

Halooooha~~~~ I’m back again, and again and again 😀 hohohohoho.
Today I will give you all a tutorial again. This tutorial is still related to previous tutorial, where we made Gulali’s button. Click here to see the tutorial.

Back again to this tutorial. So previously we make some button for your website or other design. This time we will focus on making a button for website. Why? because if you are aware, button at website have some effect like when you hover the button or when you click them. I really want give you some example here to ease you, but in wordpress here I can’t give a button effect like hover or click. But I will give a website with the effect 😀

Link << This website is one of my projects now 😀 but we won’t discuss about the design, just focus at the “view product” button. If you hover the button or click the button you will see the effect there. So today we will make button like that, from the design and some coding to make the effect work at your website 😀

========================================================================

Step 1

Let’s start with the last button you make from previous tutorial. You can make other button or just download it from the previous tutorial, I will use the PSD file that i give you at the previous tutorial.

So let’s clear this first. We will make 1 button with 3 effect. First is the normal, just like the previous Gulali’s button we made. Second is the effect when we hover the button, we will make it a little lighter. The last or the third we will make a button with a click effect.

First open your previous data. Save it as a .png file. Then group all the layer become one and name it as “Button 01”. Next duplicate the group and name it as “Button 02”. Then make group “Button 01” become invisible with click on the eye icon beside the group.

Ok we already have all we need to make the second button. Like I said before, we will make the button a little light on it. So open the layer style of the button layer *if you use my .PSD file, it will name “Background”. Make the gradient overlay’s opacity become 25% or less than your previous button.

Then you can change any things you want. Maybe like move the arrow a little down. If you already satisfied you can save the button as .png file again.

———————————————————————————————————————————–

Step 2

Next, we will make the third button. This time, we will make it look like it clicked. So first duplicate again the “Button 01” group and name it as “Button 03”. Next, open the layer style of the button layer. Set drop shadow’s blend mode become screen and the color change to somethings lighter than the button color, and opacity less than before. At inner shadow tab, blend mode become multiply and the color change to somethings darker, then opacity less than before and  set the distance to 10, choke to 10 and size to 5. The last part, Gradient overlay, just give mark at the reverse check box.


Same like the last button, save it as .png file and you got all you need take your button to your website 😀

———————————————————————————————————————————–

Step 3

We already have all the material we need. Now open any program for edit you website *I used Dreamweaver. First make a new file or open your own file. We will make the html file first, so create an new HTML file and save it with name “home.html”.

First we make a div for our button
<div class=”button”></div>

Now we make the style for our button. Make style tag above the body tag. First we will set our width and height. Make your div size as same size as your button size.

001
002
003
004
005
006
<style>
.button{
width:450px;
height:155px;
}
</style>

Next we will set our button background with the button 01.png

001
002
003
004
005
006
007
<style>
.button{
width:450px;
height:155px;
background-image:url(Button01.png);
}
</style>

Ok, now we already have our button. Next, we will give the hover effect. Just copy the previous code and paste below it. Delete the width and the height code. Change the background-image with button02.png and add “:hover” after the class name.

007
008
009
010
.button:hover{
background-image:url(Button02.png);
}
</style>

The last is the third button for the click effect. Same like before, copy the button code and change the hover with active and don’t forget change the background into button03.png

010
011
012
013
.button:active{
background-image:url(Button03.png);
}
</style>

Ok! now you already have a button with hover and click effect 😀 and if you want to make your button look more like a button in website, add “cursor:pointer;” at the button class and when you hover the button, your cursor will change into pointer.

And that’s it! You can make other creative button you like. Just remember to make 3 button, first for the normal one, second for the hover effect and last for the click effect. Like usual I hope this tutorial is useful :D .

help us to share this tutorial and I really welcome for any comments and feedbacks. See you until the next post!!! :D

xoxo

The Gulali’s Army

Tagged , , , , , , , , ,

Create a Gulali’s Button Using Photoshop -Beginner-

Hello!!! I’m back again! This time I will give you a tutorial to make your own button 😀
So you ask what button? You actually already see the button twice 😀 if you read our articles at Free Monster Maker V1.0 ” and ” Free Wallpaper Again! Today is Avenger Wallpaper “.
Yes that cute button there, soon or later we will make it together and don’t worry I will give you the source file (.PSD format) at the end of this section. So let’s start the tutorial.

Final Product

What You’ll Be Creating

========================================================================

Step 1

Let’s start with a new document in Photoshop. The size is up to you, you can create any size of button depend on what kind of button you want to make 😀 *I will use 450×150 pixel

———————————————————————————————————————————–

Step 2

Next, let’s create the button’s shape first. Start by creating a shape called “background” and fill it with any color you like. I used Rounded Retangle Tool with color #2DA9E0.

———————————————————————————————————————————–

Step 3

Ok! If you look at the button in other post, you can see that button is using gradient color, so we will set the color for our button with gradient color. But if you want using solid color, that’s not problem. To color the shape with gradient color, double click at the background layer to open the Layer style. Or right click at the layer and choose Blending Options…

Now you will see new window name layer style. Click at the Gradient Overlay. You can choose your favorite colors for the button. Or you can use the white-black color and then change the blend mode to multiply with opacity value 50%.

Next, we will give some emboss effect to our button here. So someone can feel like to click the real button :D. As same step as the gradient, open the layer style again. Now choose drop shadow *we will give our button some shadow. Oh, almost forget, before attach some shadow, we need to enlarge our canvas. Why? Because if we don’t enlarge our canvas, our shadow can’t be seen.

To enlarge your canvas, choose image > canvas size. Get the Anchor into the top middle, and add 5 pixel to our height.

Back to the shadow things. Open again the layer style, and choose the drop shadow. First change the angle become 90,  Opacity become 40%, then make the distance become 4 pixel and other 0 pixel.

Next the lighting. Open layer style again and now we will set the Inner Shadow properties. First change the blend Mode become  screen and change the color into white or other color for the shine. Like the shadow make the Opacity become 40%, distance 4 pixel and other 0 pixel and then click OK.

———————————————————————————————————————————–

Step 4

Ok, you already can see your button now. Next step is write somethings on your button. So type any word you like with any font that match with your design. You can type ” Click here ” ” Click ME! ” ” Click here to download ” ” download here “. *I use ChunkFive

Next we will give same effect for the text. Like before, give gradient, drop shadow and inner shadow effect for the text here.

———————————————————————————————————————————–

Conclusion

Voila, you just create your own button. But it can be enhanced such as you can give some picture or shape you like. May be like an arrow for download or anythings related to your design. Be creative and costumize your button for more cool looking button. You can give texture too for your button, all is up to you, OK?

The last before I close my post, I will give you the .PSD file like I tell first.

I hope this tutorial is useful :D.
help us to share this tutorial and I really welcome for any comments and feedbacks. See you until the next post!!! 😀

xoxo

The Gulali’s Army

Tagged , , , , , , , , , ,

Free wallpaper again! Today is The Avengers Wallpapers

Hello Sweets!! here we back again. Today your very generous friend will share some wallpaper hehehe 😀

Today’s topic is THE AVENGER!!!! Yeah!!! Well, it’s kinda late actualy, but I finally watch The Avenger movie yesterday!!! Hip Hip HORAYY!!!

*slapped*

Ehem.. Ok back to topic. As I said before, I’ll share some Avenger wallpaper that I made base on the movie yesterday, I hope you like it 😀 *The real reason because I’ve been tired of same old wallpaper -3-

So like the previous Free Wallpaper “Free Twilight Chibi Wallpaper+Cute Pumpkin” I will give you 4 resolutions 😀

Oh I forgot to give you some preview about the wallpaper, enjoy!!!

Thor

Black Widow

Captain America

Hawkeye

Hulk

Iron Man

I have 6 types of wallpaper, start from Thor, Black Widow, Captain America, Hawkeye, Hulk and Iron man. All in same style and have The Avenger logo in the bottom right side. Do you like it? Download it now!

*Just like previous download, I will give you 2 places for download. If you have any trouble to download, just comment ok 😀

First if you from Indonesia, you can download here (Indowebster, Local server)
Other, you can download here (Droplr)

Thats all for today. I hope you all like it. And help us share this to your friend 😀
Any problem?, just comment and it’s really nice if you can give us some feedback

xoxo

The Gulali’s Army

Tagged , , , , , , , , , , , , , ,

Compilation of Works : IPEKA Character Design

Hello sweets,

It’s been a long time since my last post. I’ve been busy lately, because of my job. Drawing endlessly about 3 weeks, plus making computer modules about Adobe Dreamweaver for highschool students.

Drawing about 7 hours a day, in 3 weeks (weekdays only), makes me crazy, yeah, really. Until to some point, I don’t wanna see my bamboo tablet again, really bored.

The good point is, now I know my limit and the time I used to draw.

Here are the compilations of 3 weeks (of perseverance and in such a hurry) :

cover_IPEKA_GulaliProduction

Book Cover in a Hurry

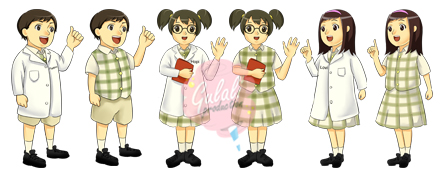
IPEKA_character_standing_compilation_gulaliproduction

Character Full Body in Costume

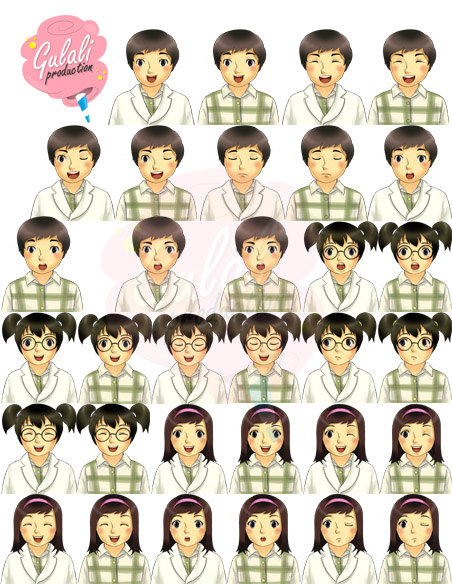
face_compilation_IPEKA_character_gulaliproduction

Faces and Expression

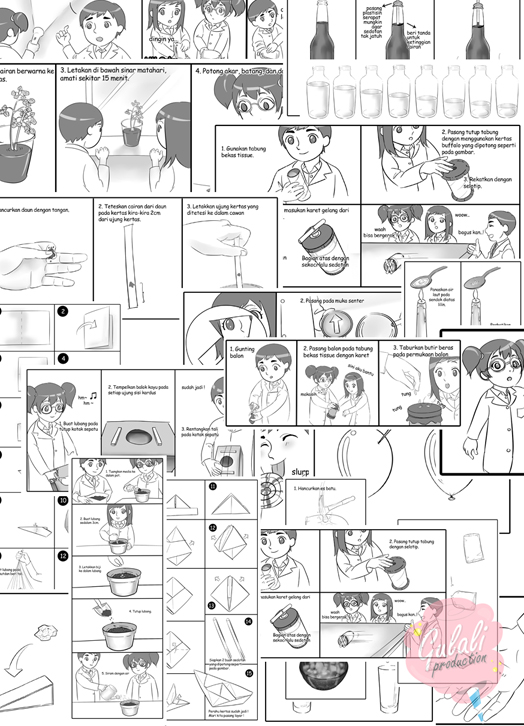
And the last, the science comic compilation (not all of them).. which consume really much time and energy T_T

science_comic_compilation_IPEKA_gulaliproduction

Science Comic Compilation

Thank God for all the time and energy while making all the pictures plus arrange the layout in such a hurry T_T

Hope all of the students can enjoy reading books more than before 🙂 Only thinking that can make me sooooo happy

xoxo

Gulali’s Army

(all characters owned by IPEKA)

Tagged , , , , , , , , , , , , , , , ,